VSCode配置Opencv环境
1.安装VS Code
2.安装MinGW
解压[[MinGW-w64]]压缩包,将该文件夹的bin路径添加到环境变量的系统变量中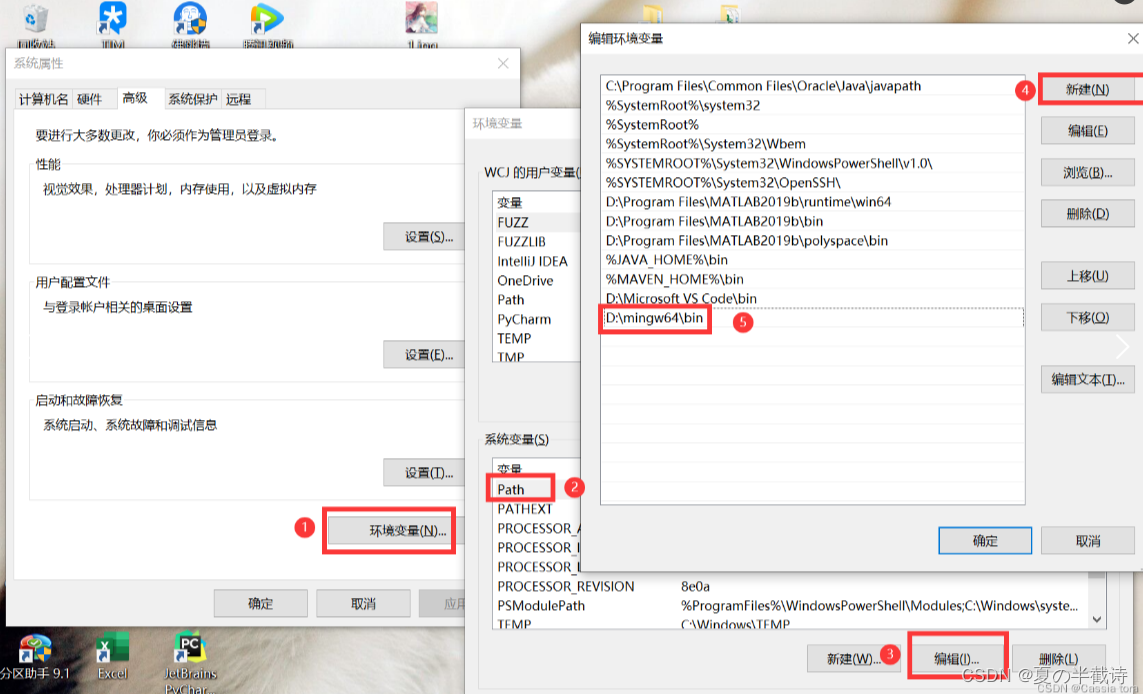
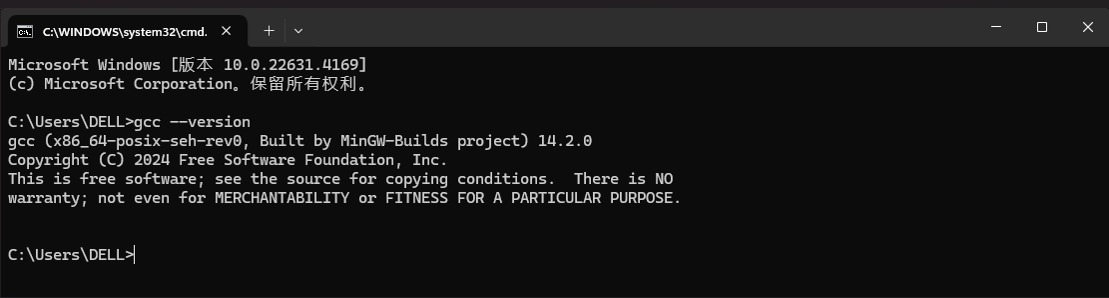
Win+R,cmd调出控制台,检查MinGW-w64是否安装成功,若成功则如下图所示:
3.安装CMake
将[[CMake]]安装包解压,文件夹如图所示: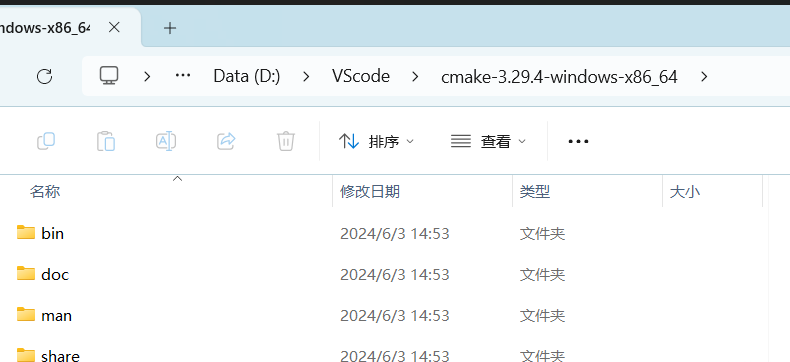
将该文件夹下的bin文件路径添加到环境变量的系统变量中: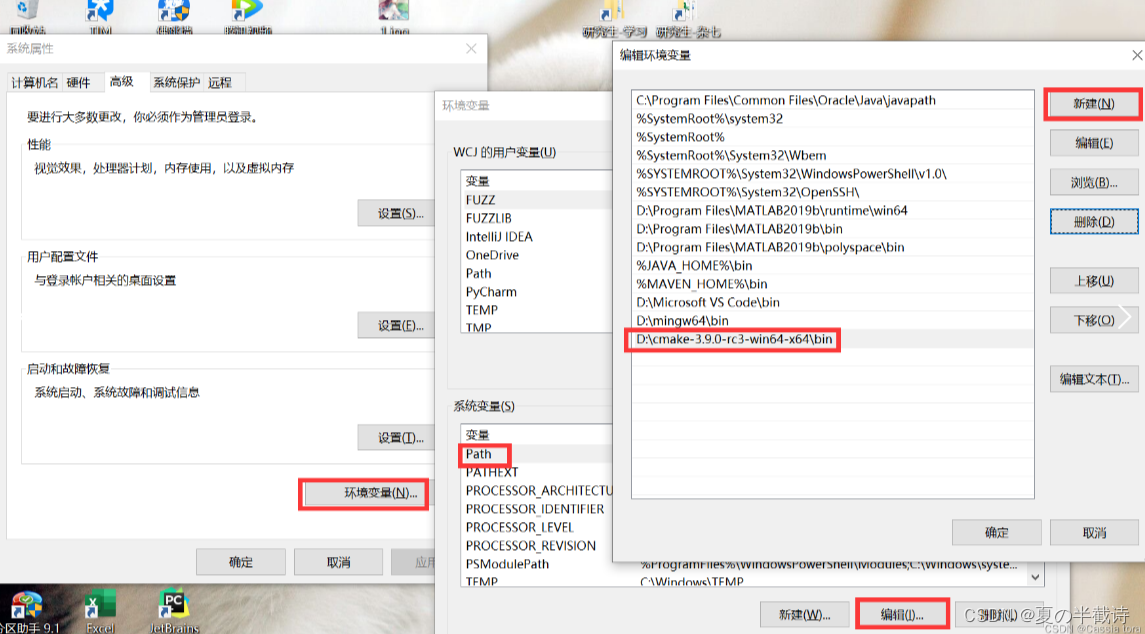
Win+R,cmd调出控制台,检查CMake是否安装成功,若成功则如下图所示:
4.OpenCV
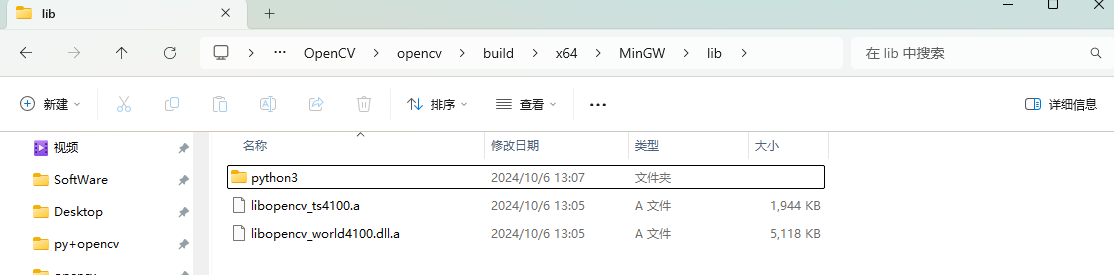
安装完OpenCV后,在 build\x64 路径下新建一个文件夹(可自起,这里是 MinGW )
5.生成MakeFiles
进入D:\cmake-3.29.4-windows-x86_64\bin :
打开cmake-gui,选择OpenCV的源文件路径和MakeFiles保存路径(即之前新建的MinGW):
点击Configure,弹窗配置如下,点击Next:
选择前面安装的D:/mingw64/bin文件夹下的gcc.exe和g++.exe,点击Finsh:
–>耐心等待中。。。
执行过程中消息框会出现一堆红色信息,最后显示Configure done,是正常的。显示Configure done后,勾选BUILD_ opencv_world、WITH_ OPENGL和BUILD EXAMPLES,不勾选WITH_IPP、WITH_MSMF和ENABLE_PRECOMPILED_HEADERS (如果有的话),CPU_ DISPATCH选空。再次点击Configure
–>耐心等待中。。。
这次执行完后仍有错误如下:
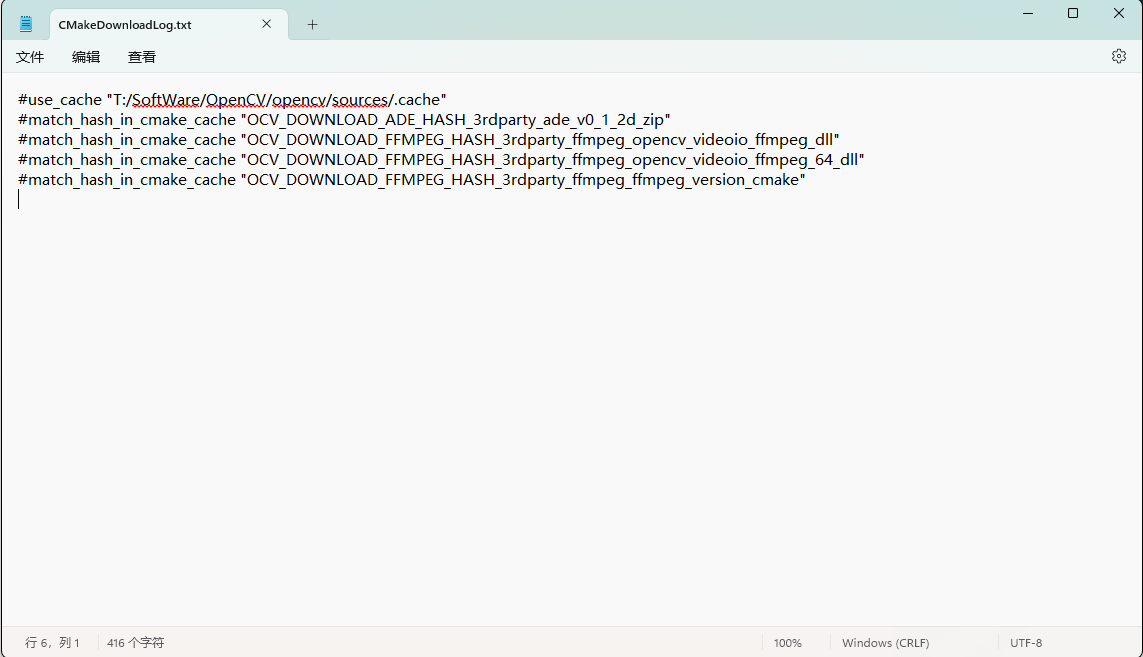
由于网络问题(最好用梯子),仍然会有文件没有成功下载,这个时候需要手动下载它们。在自创建的MinGW下的CMakeDownloadLog.txt文件中列出了所有丢失文件的下载链接,比如:
一个个访问这些链接,下载后放到OpenCV源文件里.cache的相应子文件夹中替代原缓存文件(下载的文件重命名为相应地缓存文件名并删除原缓存文件)。
附一个找了很久的仓库链接:opencv_3rdparty/ffmpeg/ffmpeg_version.cmake at ffmpeg/4.x_20240522_src · opencv/opencv_3rdparty · GitHub
附一个经验贴:
学习OpenCV3:Cmake编译OpenCV时无法下载ffmpeg、xfeatures2d等文件_ffmpeg: download failed: 6;”couldn’t resolve host -CSDN博客
或者按这个来:
cmake编译Opencv出现ffmpeg_cmake手动下载后也无法使用问题_opencv 编译 ffmpeg 无法打开-CSDN博客
这样从头到尾下载CMakeDownloadLog.txt中列出的所有丢失文件,之后,再次点击Configure,出现configure down之后查看CMakeDownloadLog.txt文件,成功了显示下图:
之后点击Generate,显示Generate Done。
6.编译OpenCV
使用 cmake 时要求安装 python3(版本没有限制,比2高就行),并且python 必须配好了环境变量。
cmd到MakeFiles所在文件夹(如何cmd),执行如下命令:
1 | |
如果遇到以下错误
mingw32-make: *** No targets specified and no makefile found. Stop. in VSCODE win10-CSDN博客很可能只是你没有cmd到makefiles那里执行,就是自建的/x64/MinGW那里
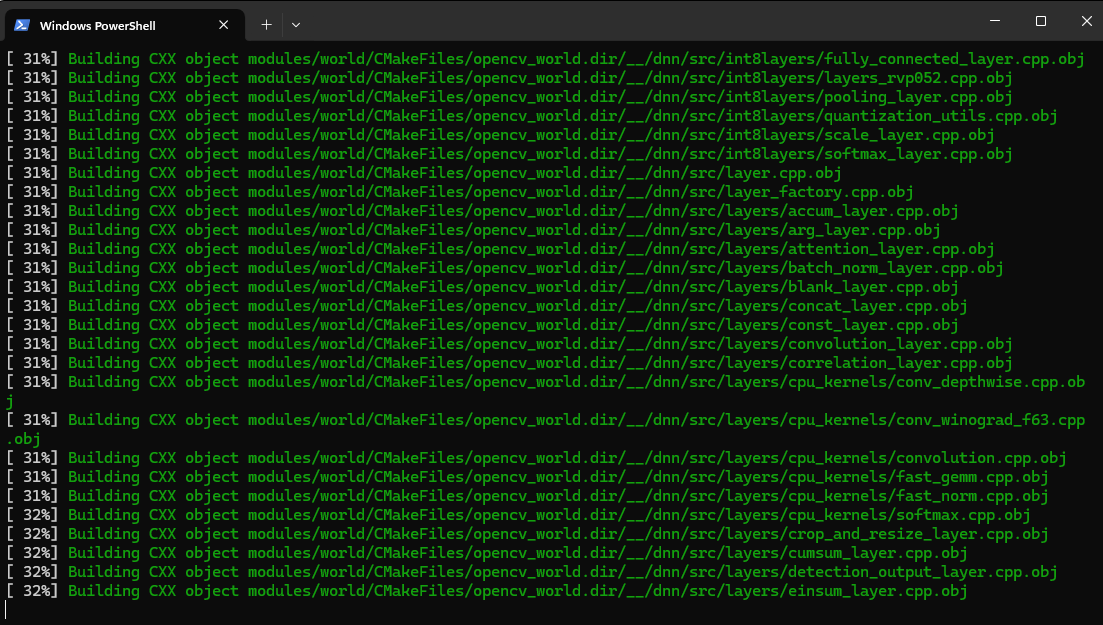
编译进行中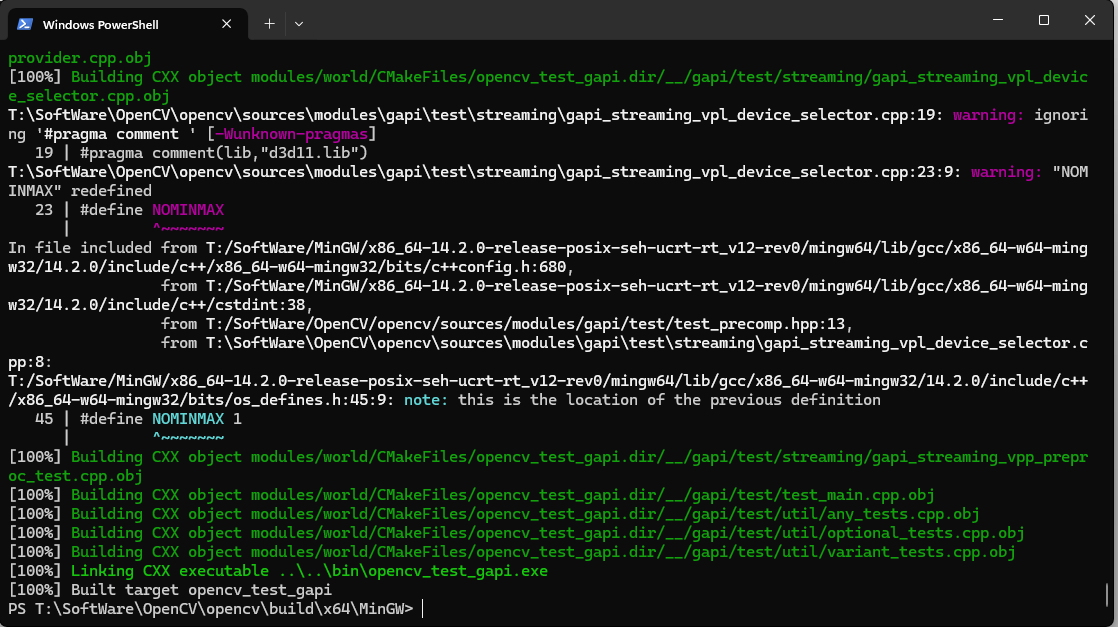
编译完成
如果报错可查阅编译报错解答,如果编译成功则执行如下命令完成装载:
1 | |
装载完成后
将D:\opencv\build\x64\MinGW\bin加到环境变量的系统变量中: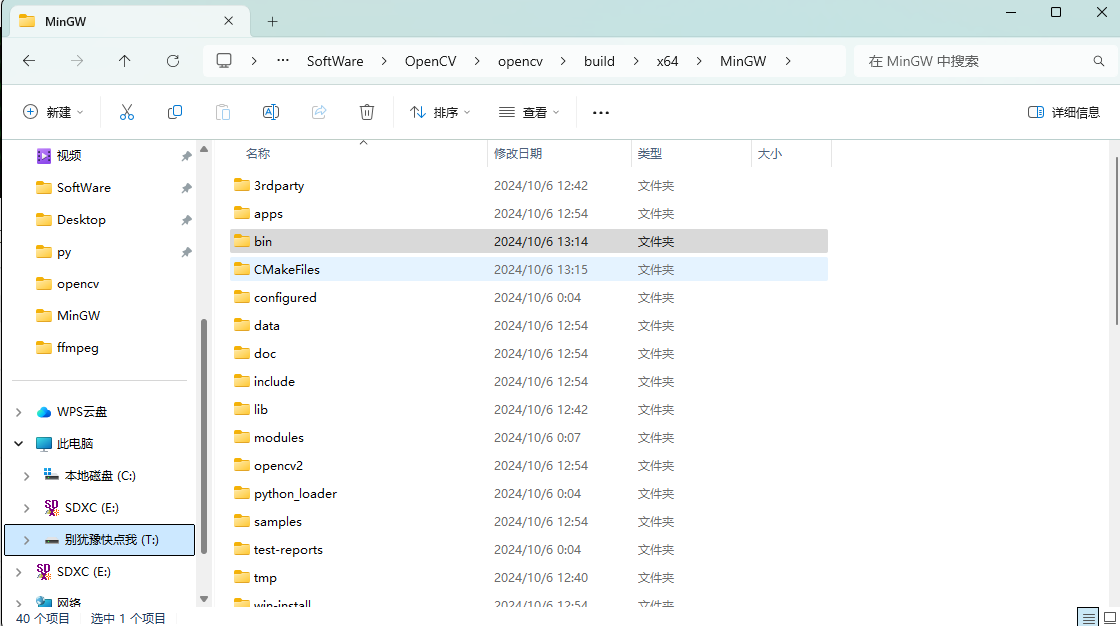
7.VS Code配置
(1)launch.json配置
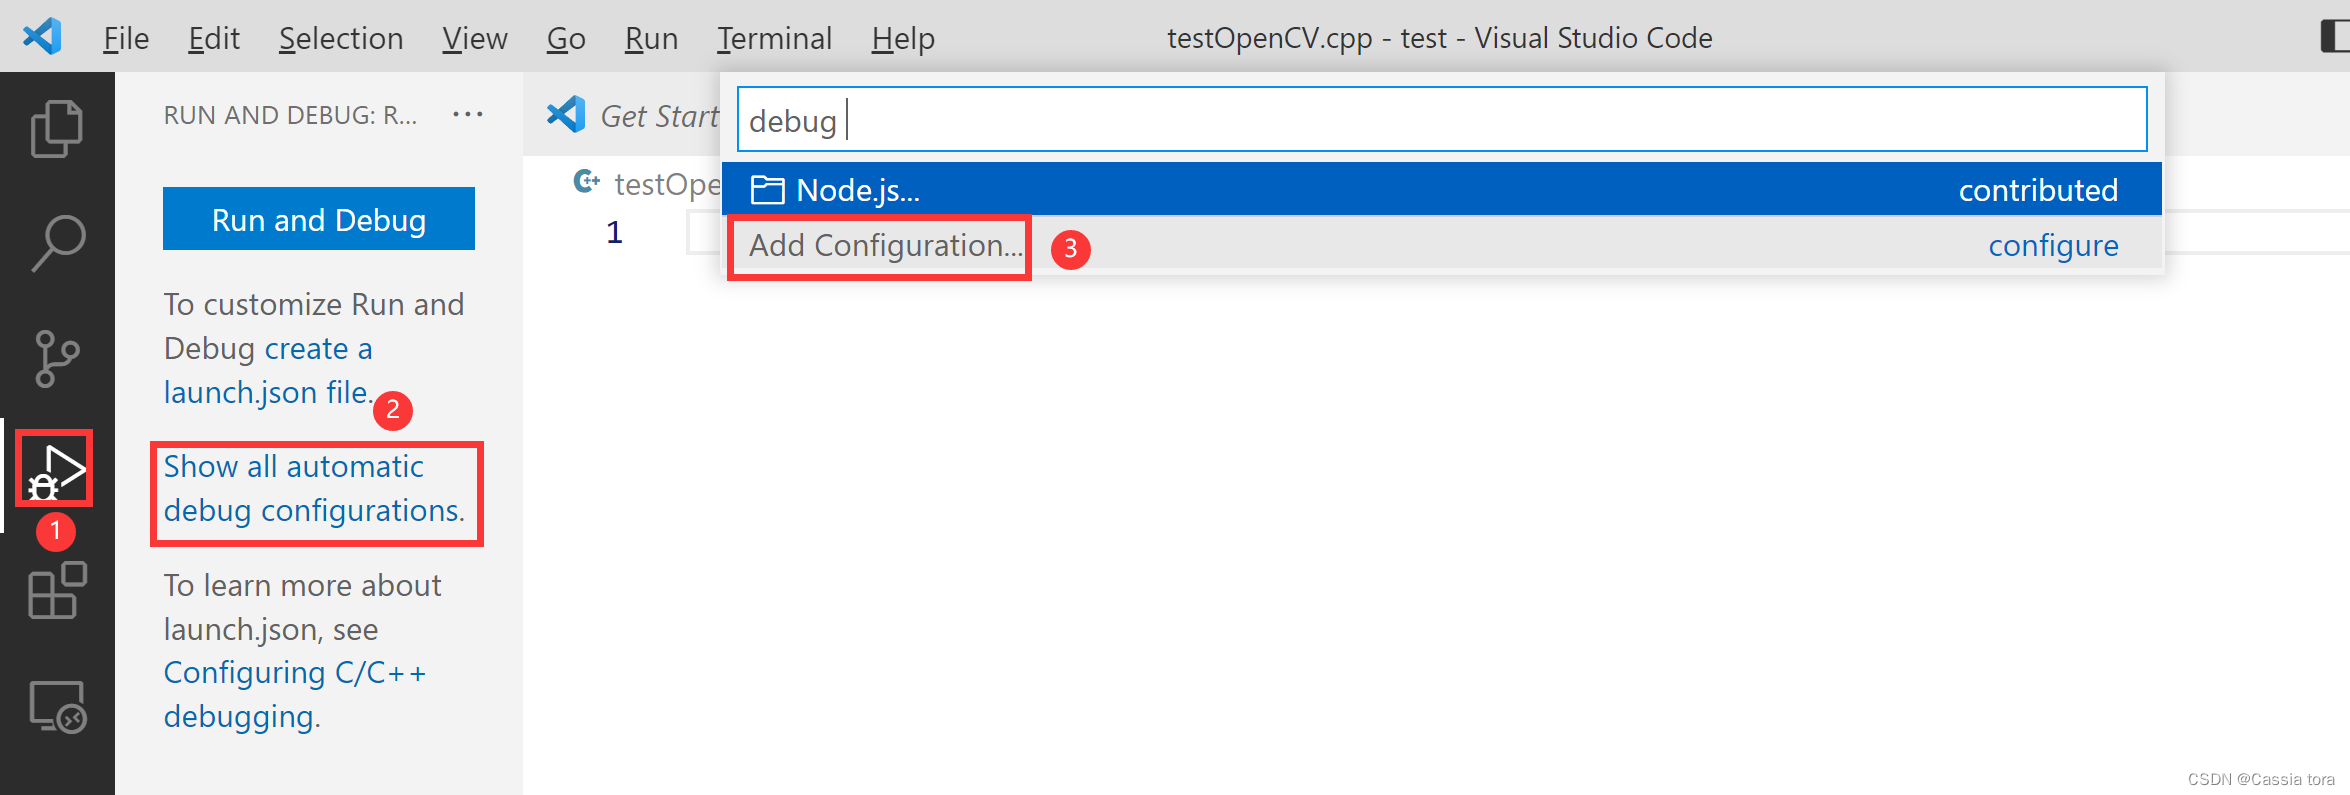
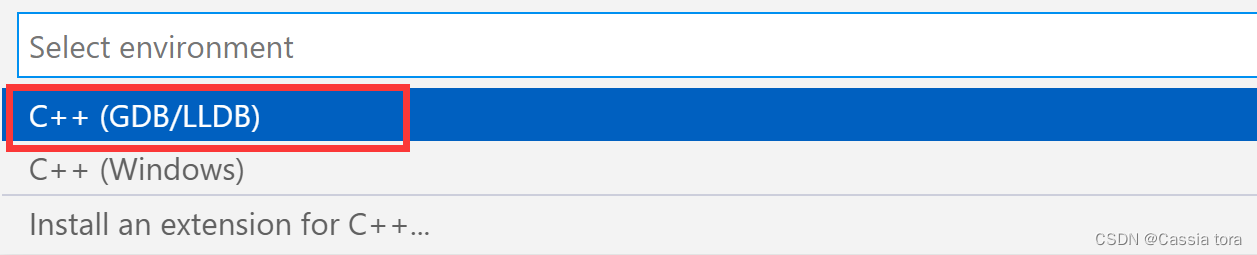
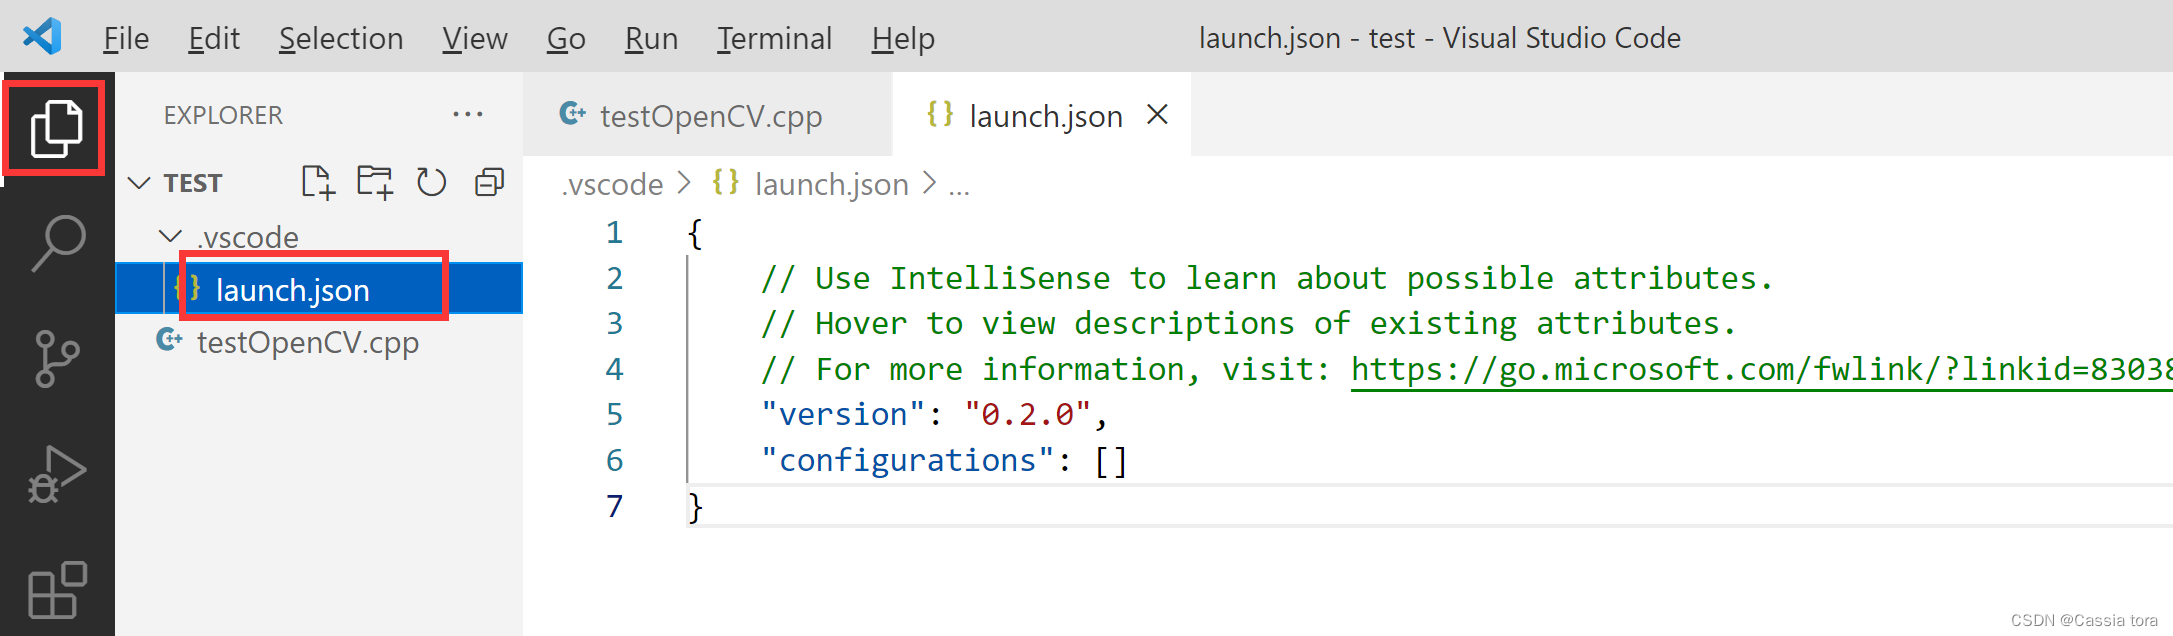
在生成的launch.json文件中复制一下代码(需要配置miDebuggerPath项,注意修改name、preLaunchTask的 opencv版本号):
{
"version": "0.2.0",
"configurations": [
    {
        "name": "opencv4.5.5 debuge",
        "type": "cppdbg",
        "request": "launch",
        "program": "${workspaceFolder}\\${fileBasenameNoExtension}.exe",
        "args": [],
        "stopAtEntry": true,
        "cwd": "${workspaceFolder}",
        "environment": [],
        "externalConsole": true,
        "MIMode": "gdb",
        "miDebuggerPath": "D:/mingw64/bin/gdb.exe",
        "setupCommands": [
            {
                "description": "为 gdb 启用整齐打印",
                "text": "-enable-pretty-printing",
                "ignoreFailures": false
            }
        ],
        "preLaunchTask": "opencv4.5.5 compile task"
    }
]
}
比如我更改为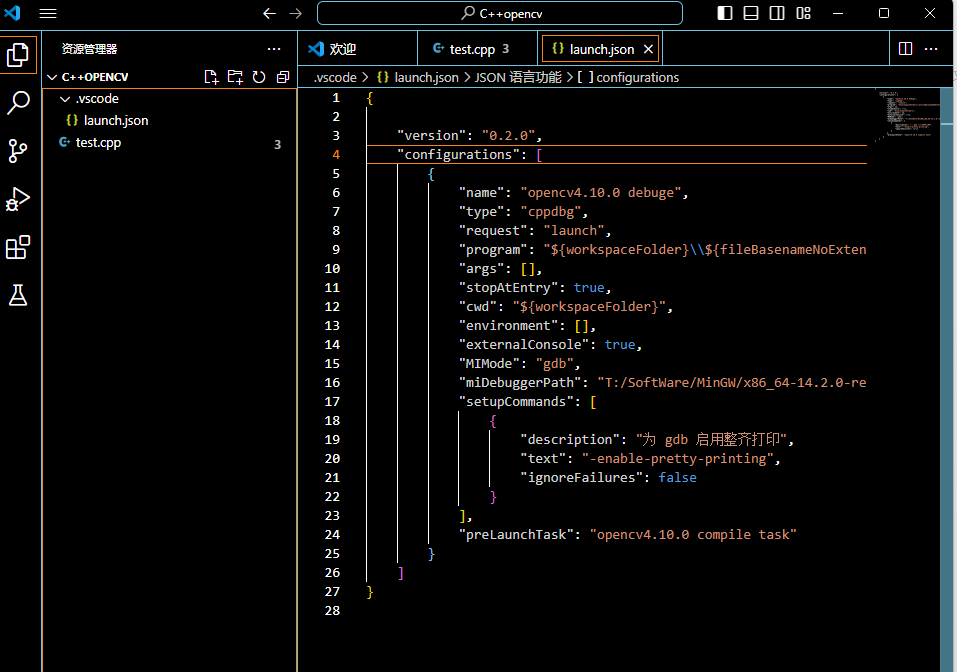
c_cpp_properties.json配置
按快捷键crtl+shift+p,出现如下弹窗:(也可以自己手敲) 点击C/C++:Edit Confighrations(UI)进行如下配置:
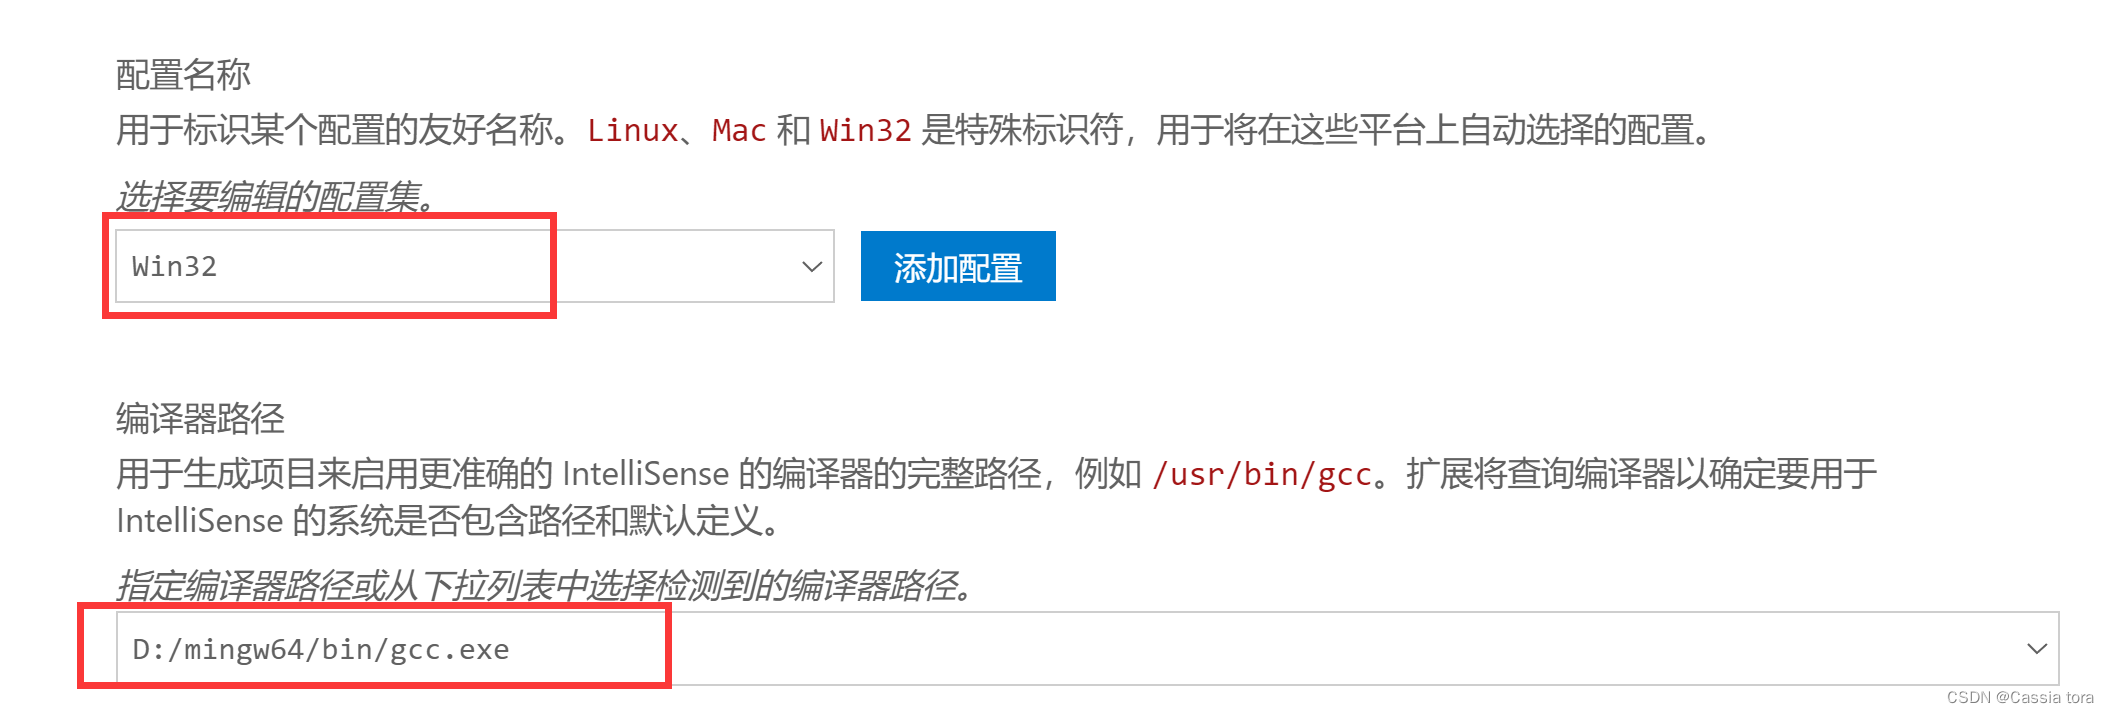
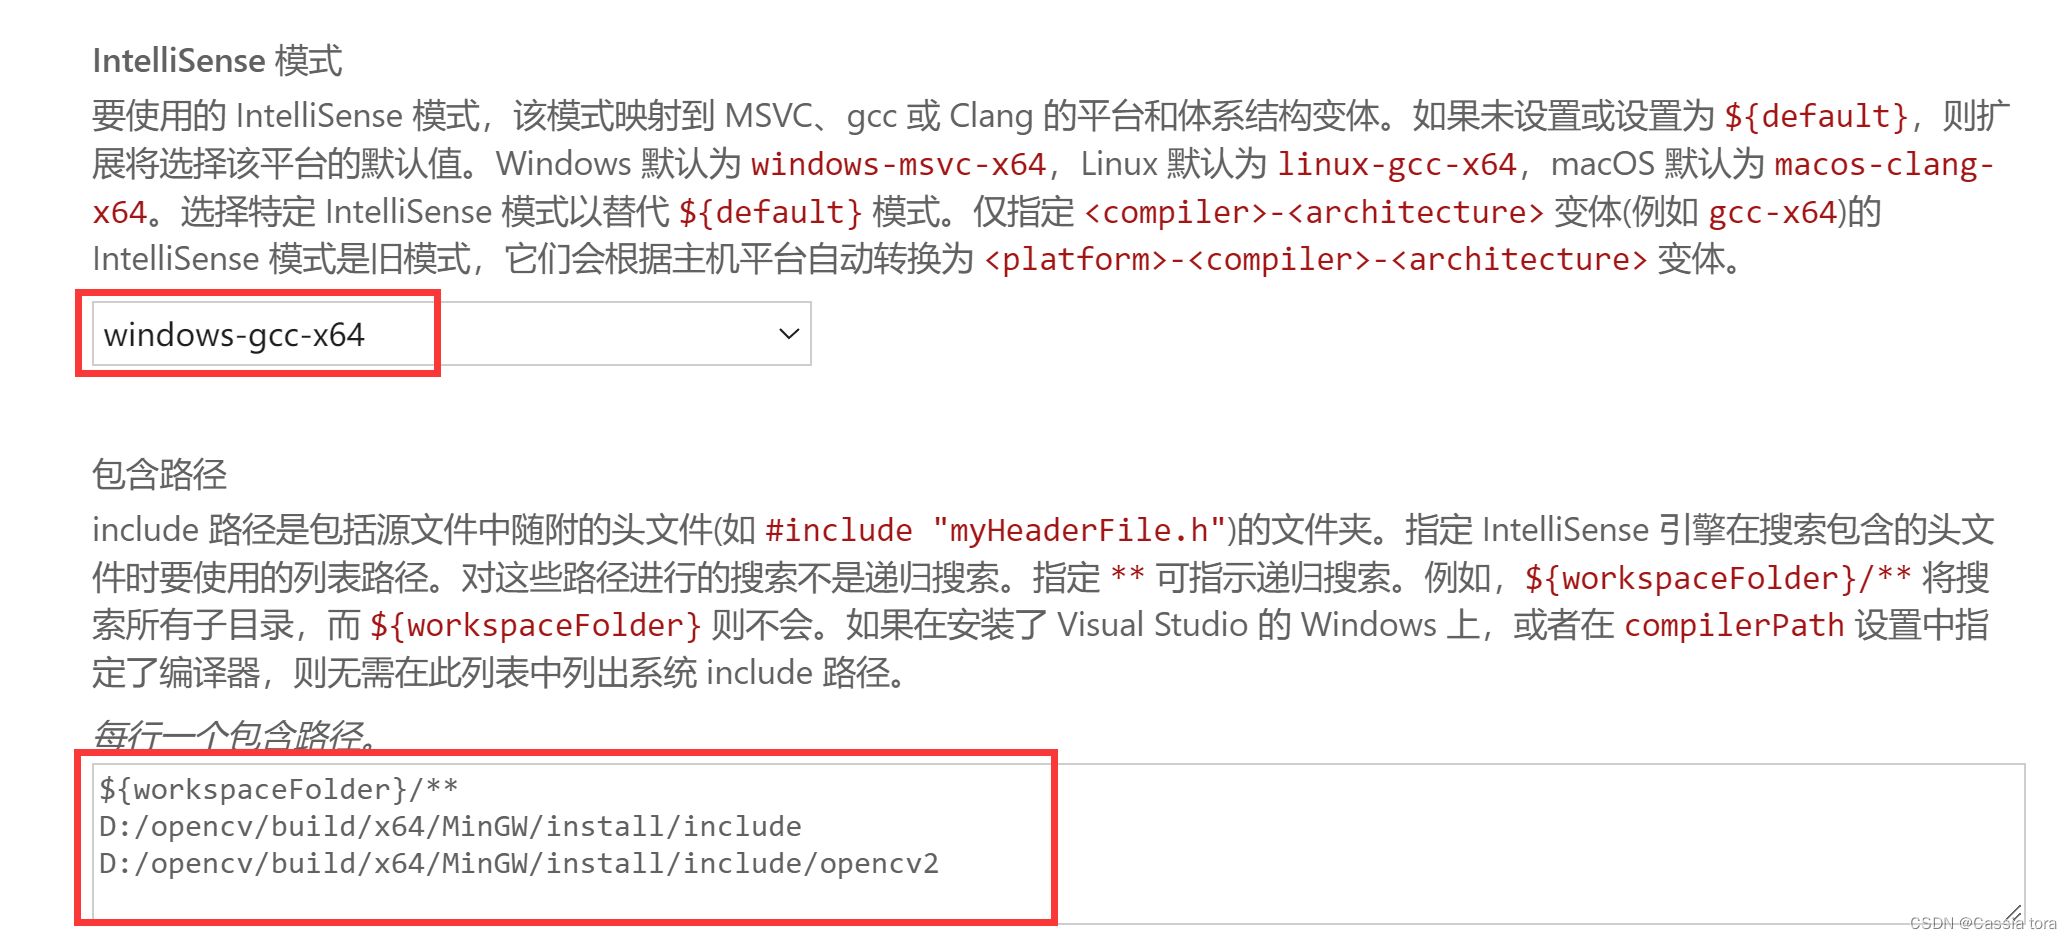
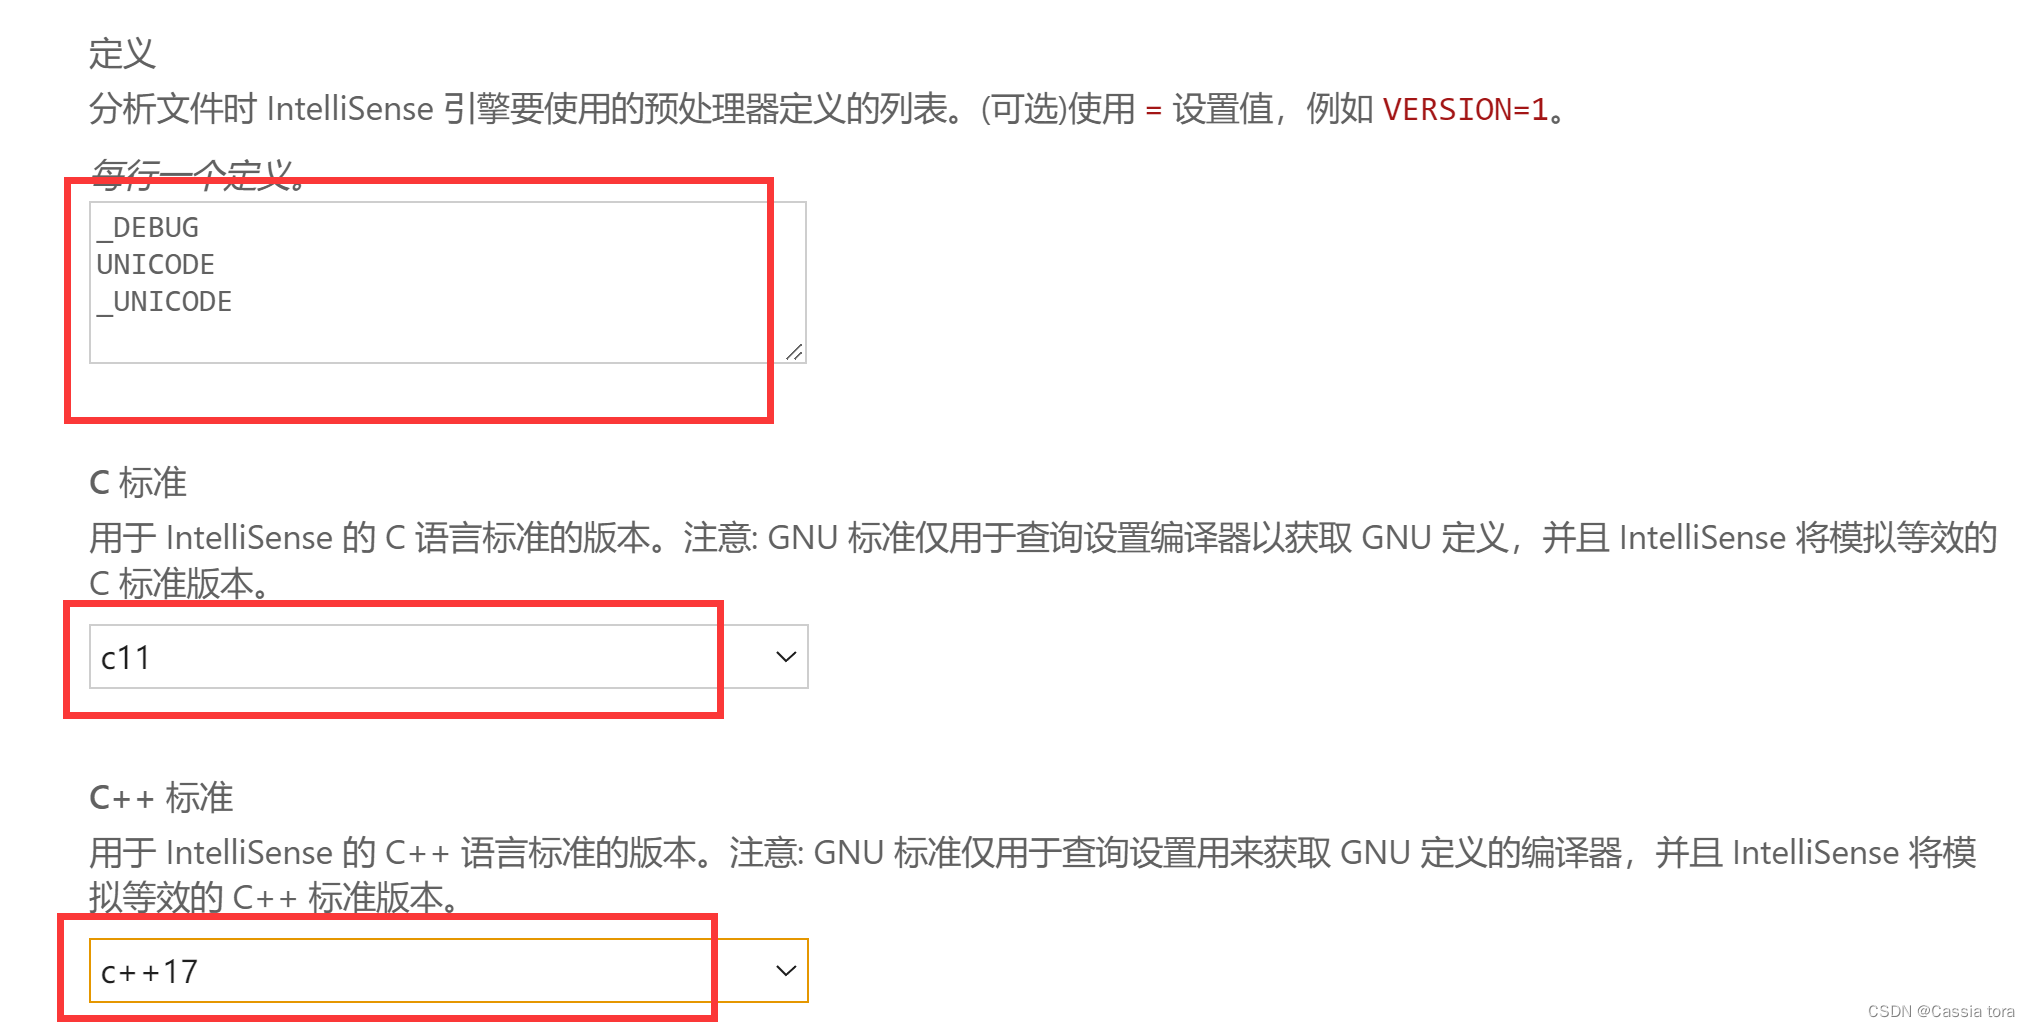
配置完成会自动生成c_cpp_properties.json文件: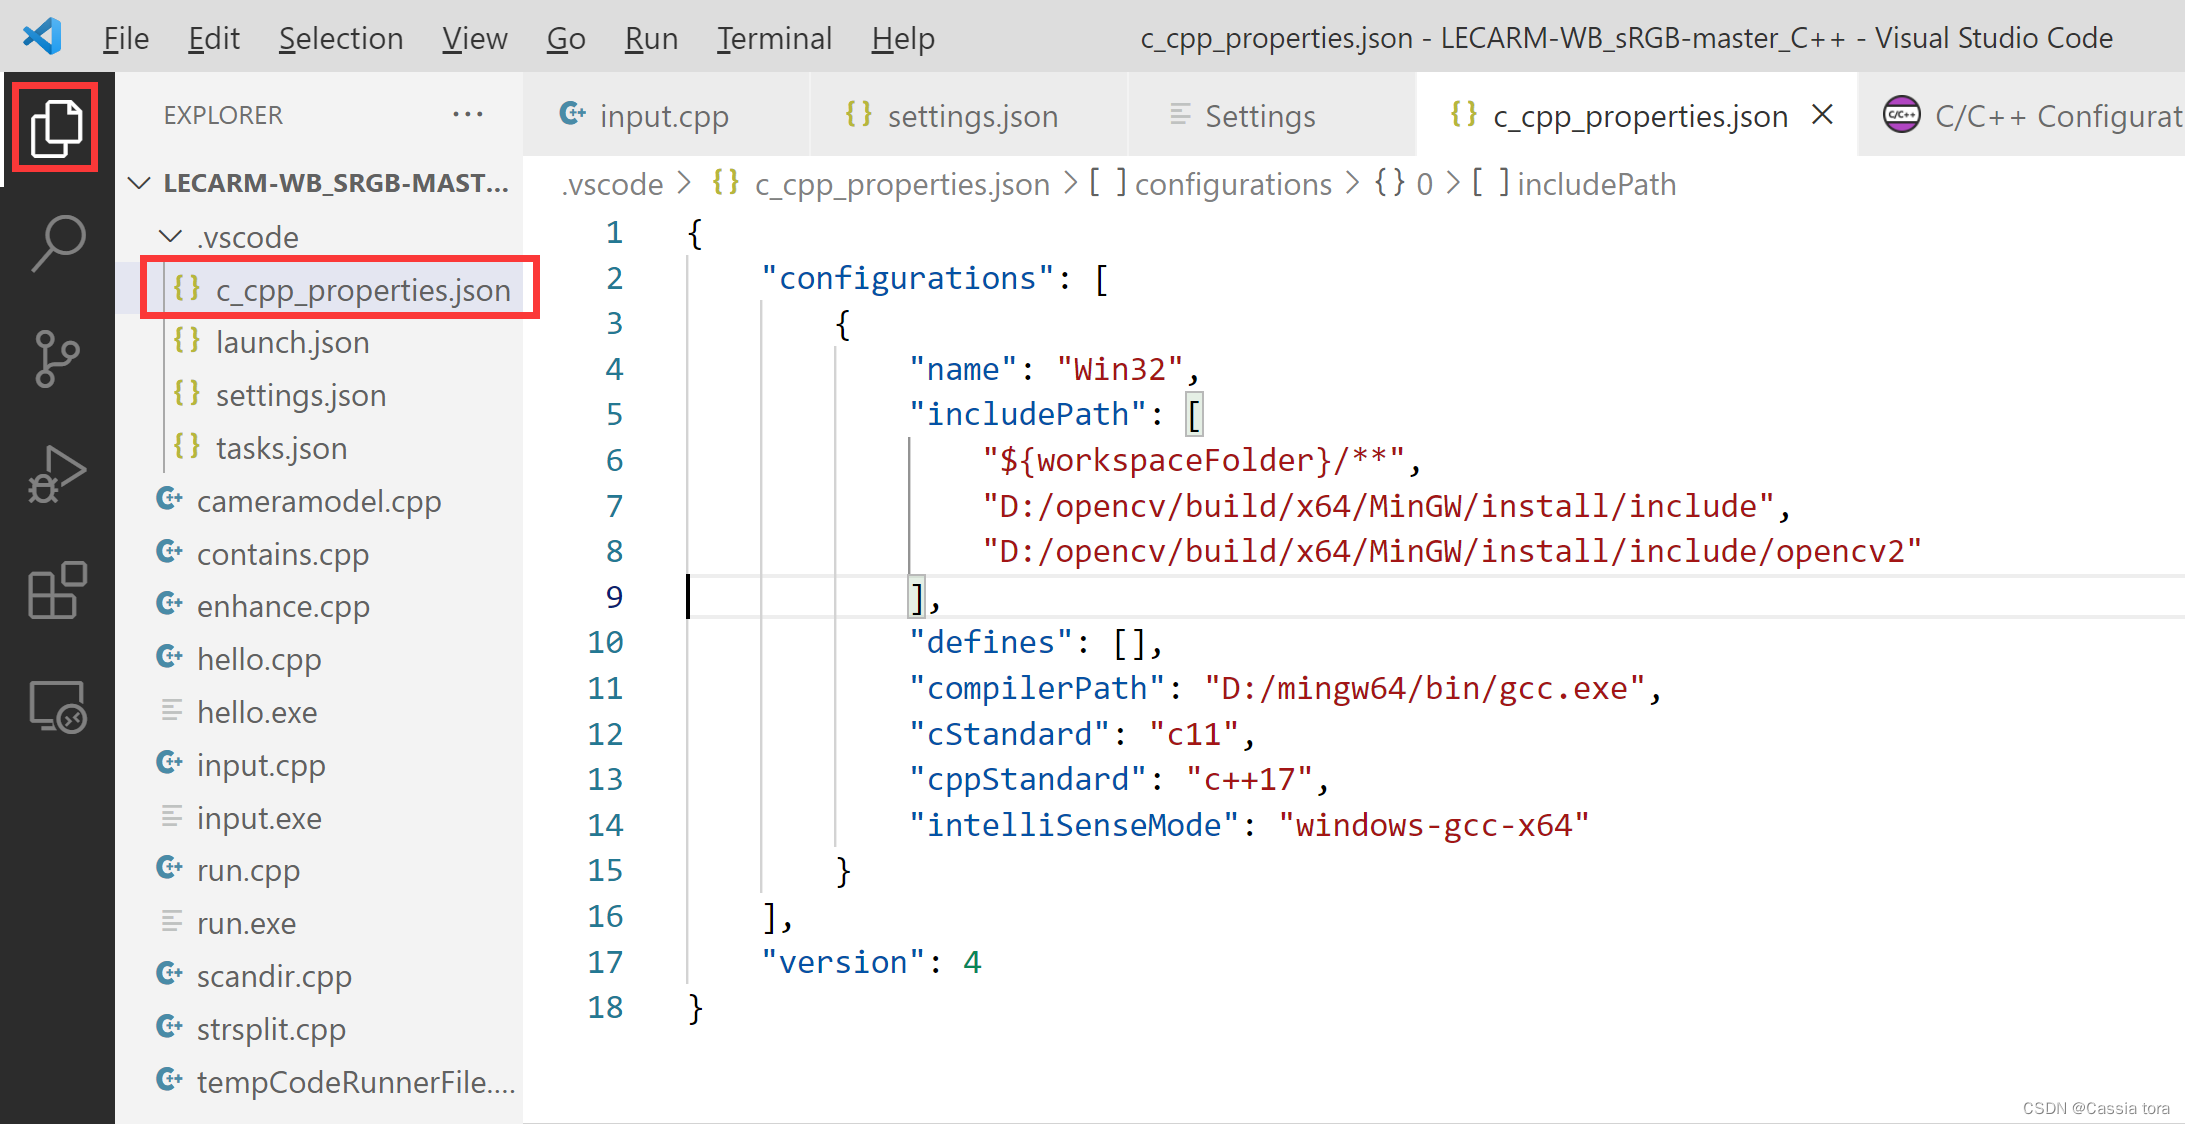
settings.json配置
按ctrl+, 出现如下弹窗,输入code-runner:Executor Map,点击下方的 Edit in settings.json
点击 Edit in settings.json之后会生成settigs.json(该文件地址是:C:\Users\WCJ\AppData\Roaming\Code\User\settings.json),在生成的settings.json中复制如下代码(注意修改cpp项的地址和链接插件):
{
“workbench.colorTheme”: “Default Light+”,
“editor.suggest.snippetsPreventQuickSuggestions”: false,
“code-runner.runInTerminal”: true,
“files.autoSave”: “afterDelay”,
“code-runner.executorMap”: {
    "javascript": "node",
    "java": "cd $dir && javac $fileName && java $fileNameWithoutExt",
    "c": "cd $dir && gcc $fileName -o $fileNameWithoutExt && $dir$fileNameWithoutExt",
    "cpp":"cd $dir && g++ $fileName -o $fileNameWithoutExt -I D:/opencv/build/include -L D:/opencv/build/x64/MinGW/bin  -l libopencv_world455 -l opencv_videoio_ffmpeg455_64 && $dir$fileNameWithoutExt",
    "objective-c": "cd $dir && gcc -framework Cocoa $fileName -o $fileNameWithoutExt && $dir$fileNameWithoutExt",
    "php": "php",
    "python": "python -u",
    "perl": "perl",
    "perl6": "perl6",
    "ruby": "ruby",
    "go": "go run",
    "lua": "lua",
    "groovy": "groovy",
    "powershell": "powershell -ExecutionPolicy ByPass -File",
    "bat": "cmd /c",
    "shellscript": "bash",
    "fsharp": "fsi",
    "csharp": "scriptcs",
    "vbscript": "cscript //Nologo",
    "typescript": "ts-node",
    "coffeescript": "coffee",
    "scala": "scala",
    "swift": "swift",
    "julia": "julia",
    "crystal": "crystal",
    "ocaml": "ocaml",
    "r": "Rscript",
    "applescript": "osascript",
    "clojure": "lein exec",
    "haxe": "haxe --cwd $dirWithoutTrailingSlash --run $fileNameWithoutExt",
    "rust": "cd $dir && rustc $fileName && $dir$fileNameWithoutExt",
    "racket": "racket",
    "scheme": "csi -script",
    "ahk": "autohotkey",
    "autoit": "autoit3",
    "dart": "dart",
    "pascal": "cd $dir && fpc $fileName && $dir$fileNameWithoutExt",
    "d": "cd $dir && dmd $fileName && $dir$fileNameWithoutExt",
    "haskell": "runhaskell",
    "nim": "nim compile --verbosity:0 --hints:off --run",
    "lisp": "sbcl --script",
    "kit": "kitc --run",
    "v": "v run",
    "sass": "sass --style expanded",
    "scss": "scss --style expanded",
    "less": "cd $dir && lessc $fileName $fileNameWithoutExt.css",
    "FortranFreeForm": "cd $dir && gfortran $fileName -o $fileNameWithoutExt && $dir$fileNameWithoutExt",
    "fortran-modern": "cd $dir && gfortran $fileName -o $fileNameWithoutExt && $dir$fileNameWithoutExt",
    "fortran_fixed-form": "cd $dir && gfortran $fileName -o $fileNameWithoutExt && $dir$fileNameWithoutExt",
    "fortran": "cd $dir && gfortran $fileName -o $fileNameWithoutExt && $dir$fileNameWithoutExt"
},
"window.zoomLevel": 1,
"files.associations": {
    "iostream": "cpp",
    "ostream": "cpp"
}
}
主要修改cpp项
-I
-L
-i

最后完成修改。
上述过程配合一个新建的例程测试,这里提供如下
1 | |
8.运行测试
运行结果如下,测试成功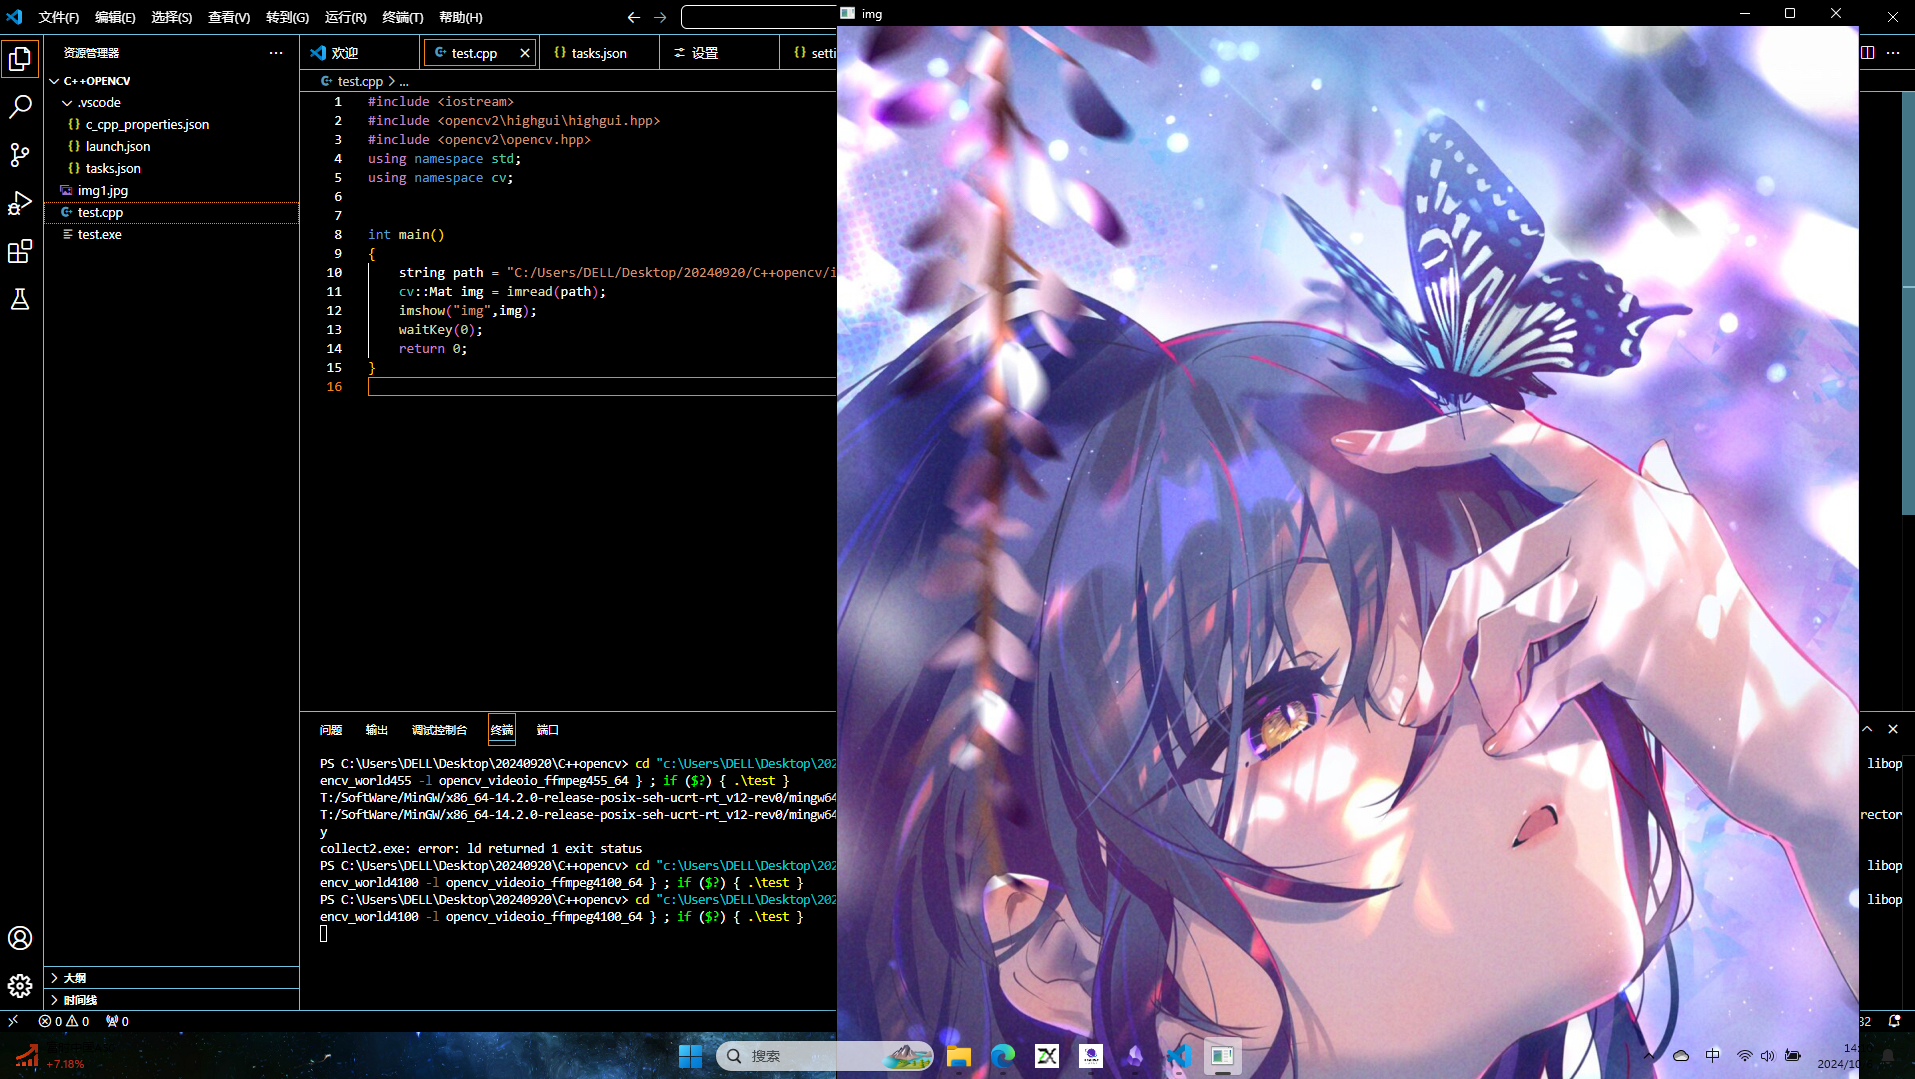
“觉得不错的话,给点打赏吧 ୧(๑•̀⌄•́๑)૭”

微信支付

支付宝支付